Museum Monday: Tyvek Pillows for Object Transport
- Becky Fifield

- Mar 25, 2013
- 2 min read

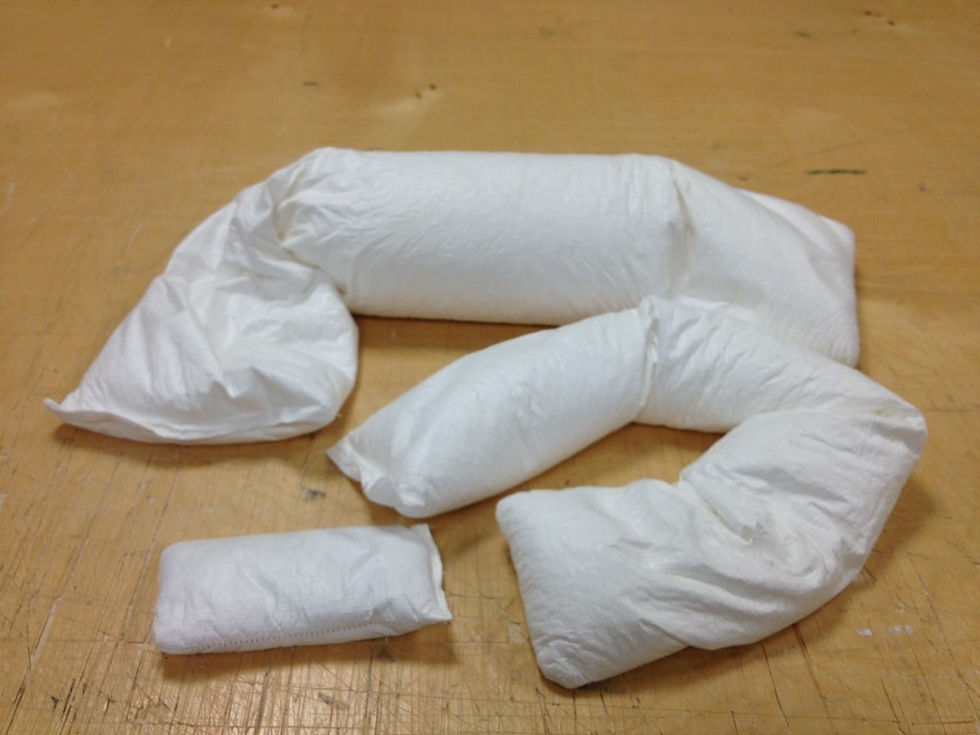
Tyvek pillows with (back to front) Ethafoam crumb, polypropylene bead, and glass sand filling. RL Fifield, 2012.
Never use sad, crumpled up pieces of tissue again for object transport! Switch to Tyvek pillows.
While this isn’t a new idea, I assembled at least fifty of these in the last couple of years. I work with ethnographic sculpture, much of which has experienced insect damage prior to its collection by museums. They have fragile surfaces of ritually applied materials. Their shapes can be difficult to support. Tyvek pillows can be made in various shapes and sizes and different fillings to provide adjustable support as you examine objects, transport them within your museum, and for storage.
I have used polyethylene foam (Ethafoam) crumb, polypropylene beads, and glass sand to fill the Tyvek sleeves. All of these materials are appropriate for permanent storage (the Tyvek must be washed). The different fillings are useful depending on whether you want to weight or cushion the object. The only skill needed is basic machine sewing techniques. I make the weighted versions with double sleeves and tight stitching to reduce the risk of losing the filling.
Materials:
Tyvek Softwrap Ethafoam Crystal (University Products), or polypropylene beads or glass sand (from doll suppliers) Sewing Thread
Equipment:
Sewing Machine Scissors or Utility Knife A Scoop
Instructions:
WASHING: Wash Soft Tyvek in a washing machine with free/clear detergent. Rinse twice. Drape the Tyvek Softwrap over clean non-upholstered chairs or a laundry rack. NOTE: Do not use the dryer to dry wet Tyvek as it will melt.
CUTTING: Determine the size and shape of pillow you wish to make. Flat rectangles are good padding art when resting on tables. Small rectangles can be used for padding within boxes. Snakes and bolsters are also useful shapes. Cut the shapes from the dried Tyvek.
STITCHING: Tyvek has two different surfaces: one slick (the right side), the other soft and grabby (the wrong side). Place right side to right side and stitch all but one side of the Tyvek pillow. Use a small stitch, as Ethafoam crumb dust can empty through larger stitches. Turn pillow right side out. NOTE: set up an assembly line and stitch up many of the Tyvek cases at once. Make two for each pillow for added strength.
FILLING: Do not do this in a “clean” space, such as your storeroom. Use a scoop to ladle the Ethafoam crumb (or PPE beads/glass sand) into the pillow case to reduce dust. Fill to your ideal capacity. Do not overfill – the idea is to create a malleable shape that can conform to whatever object you are working with. The soft inner surface of the pillow case will prevent the Ethafoam crumb from shifting around too much.
CLOSING: After you have filled the pillow to your liking, fold in the cut edges and topstitch on the sewing machine. NOTE: this can be difficult with bolster shaped pillows, but can be done and is more effective and stronger than a hand-stitched finish.
CLEANING: Use a microfiber cloth to pick up and surface dirt off the Tyvek pillow surface.


Comments